
How to send an invoice in Numo
To be paid via Numo, you'll create an invoice and share it with your customer.
Create the invoice
From the Invoices tab, select New Invoice
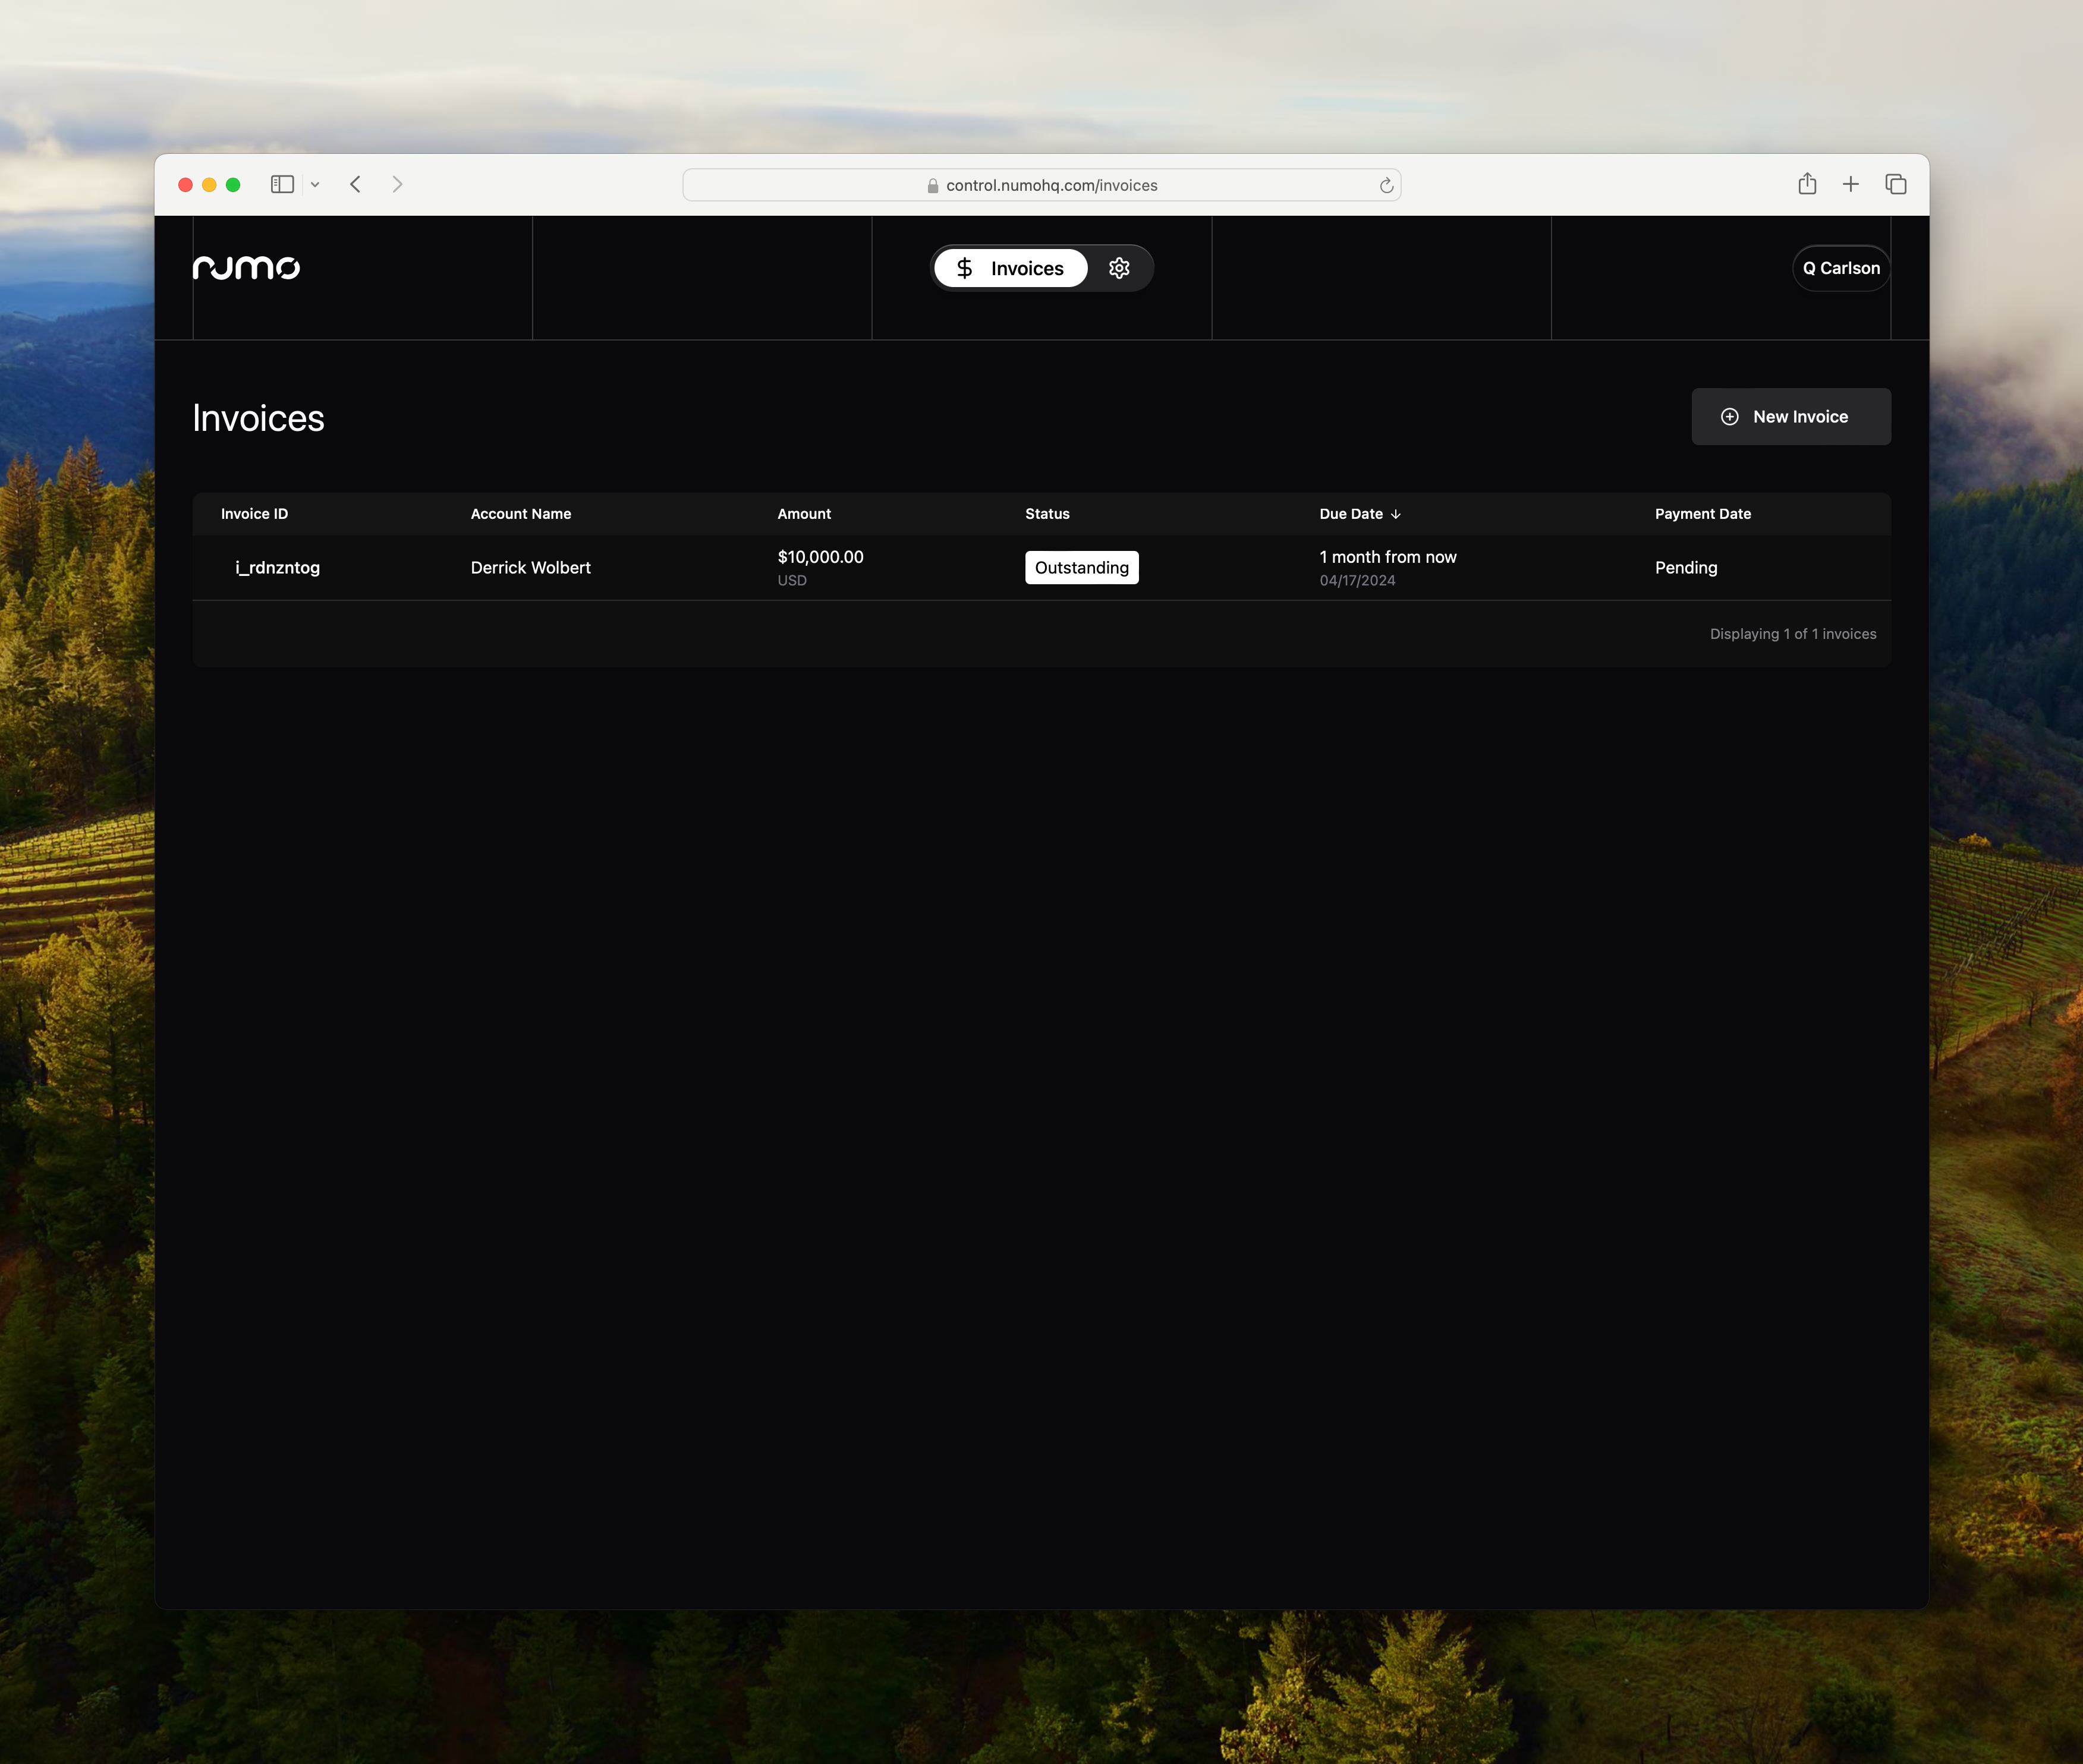
You can either select a customer you have already invoiced before, or create a new customer.

You will then complete the details of your invoice.
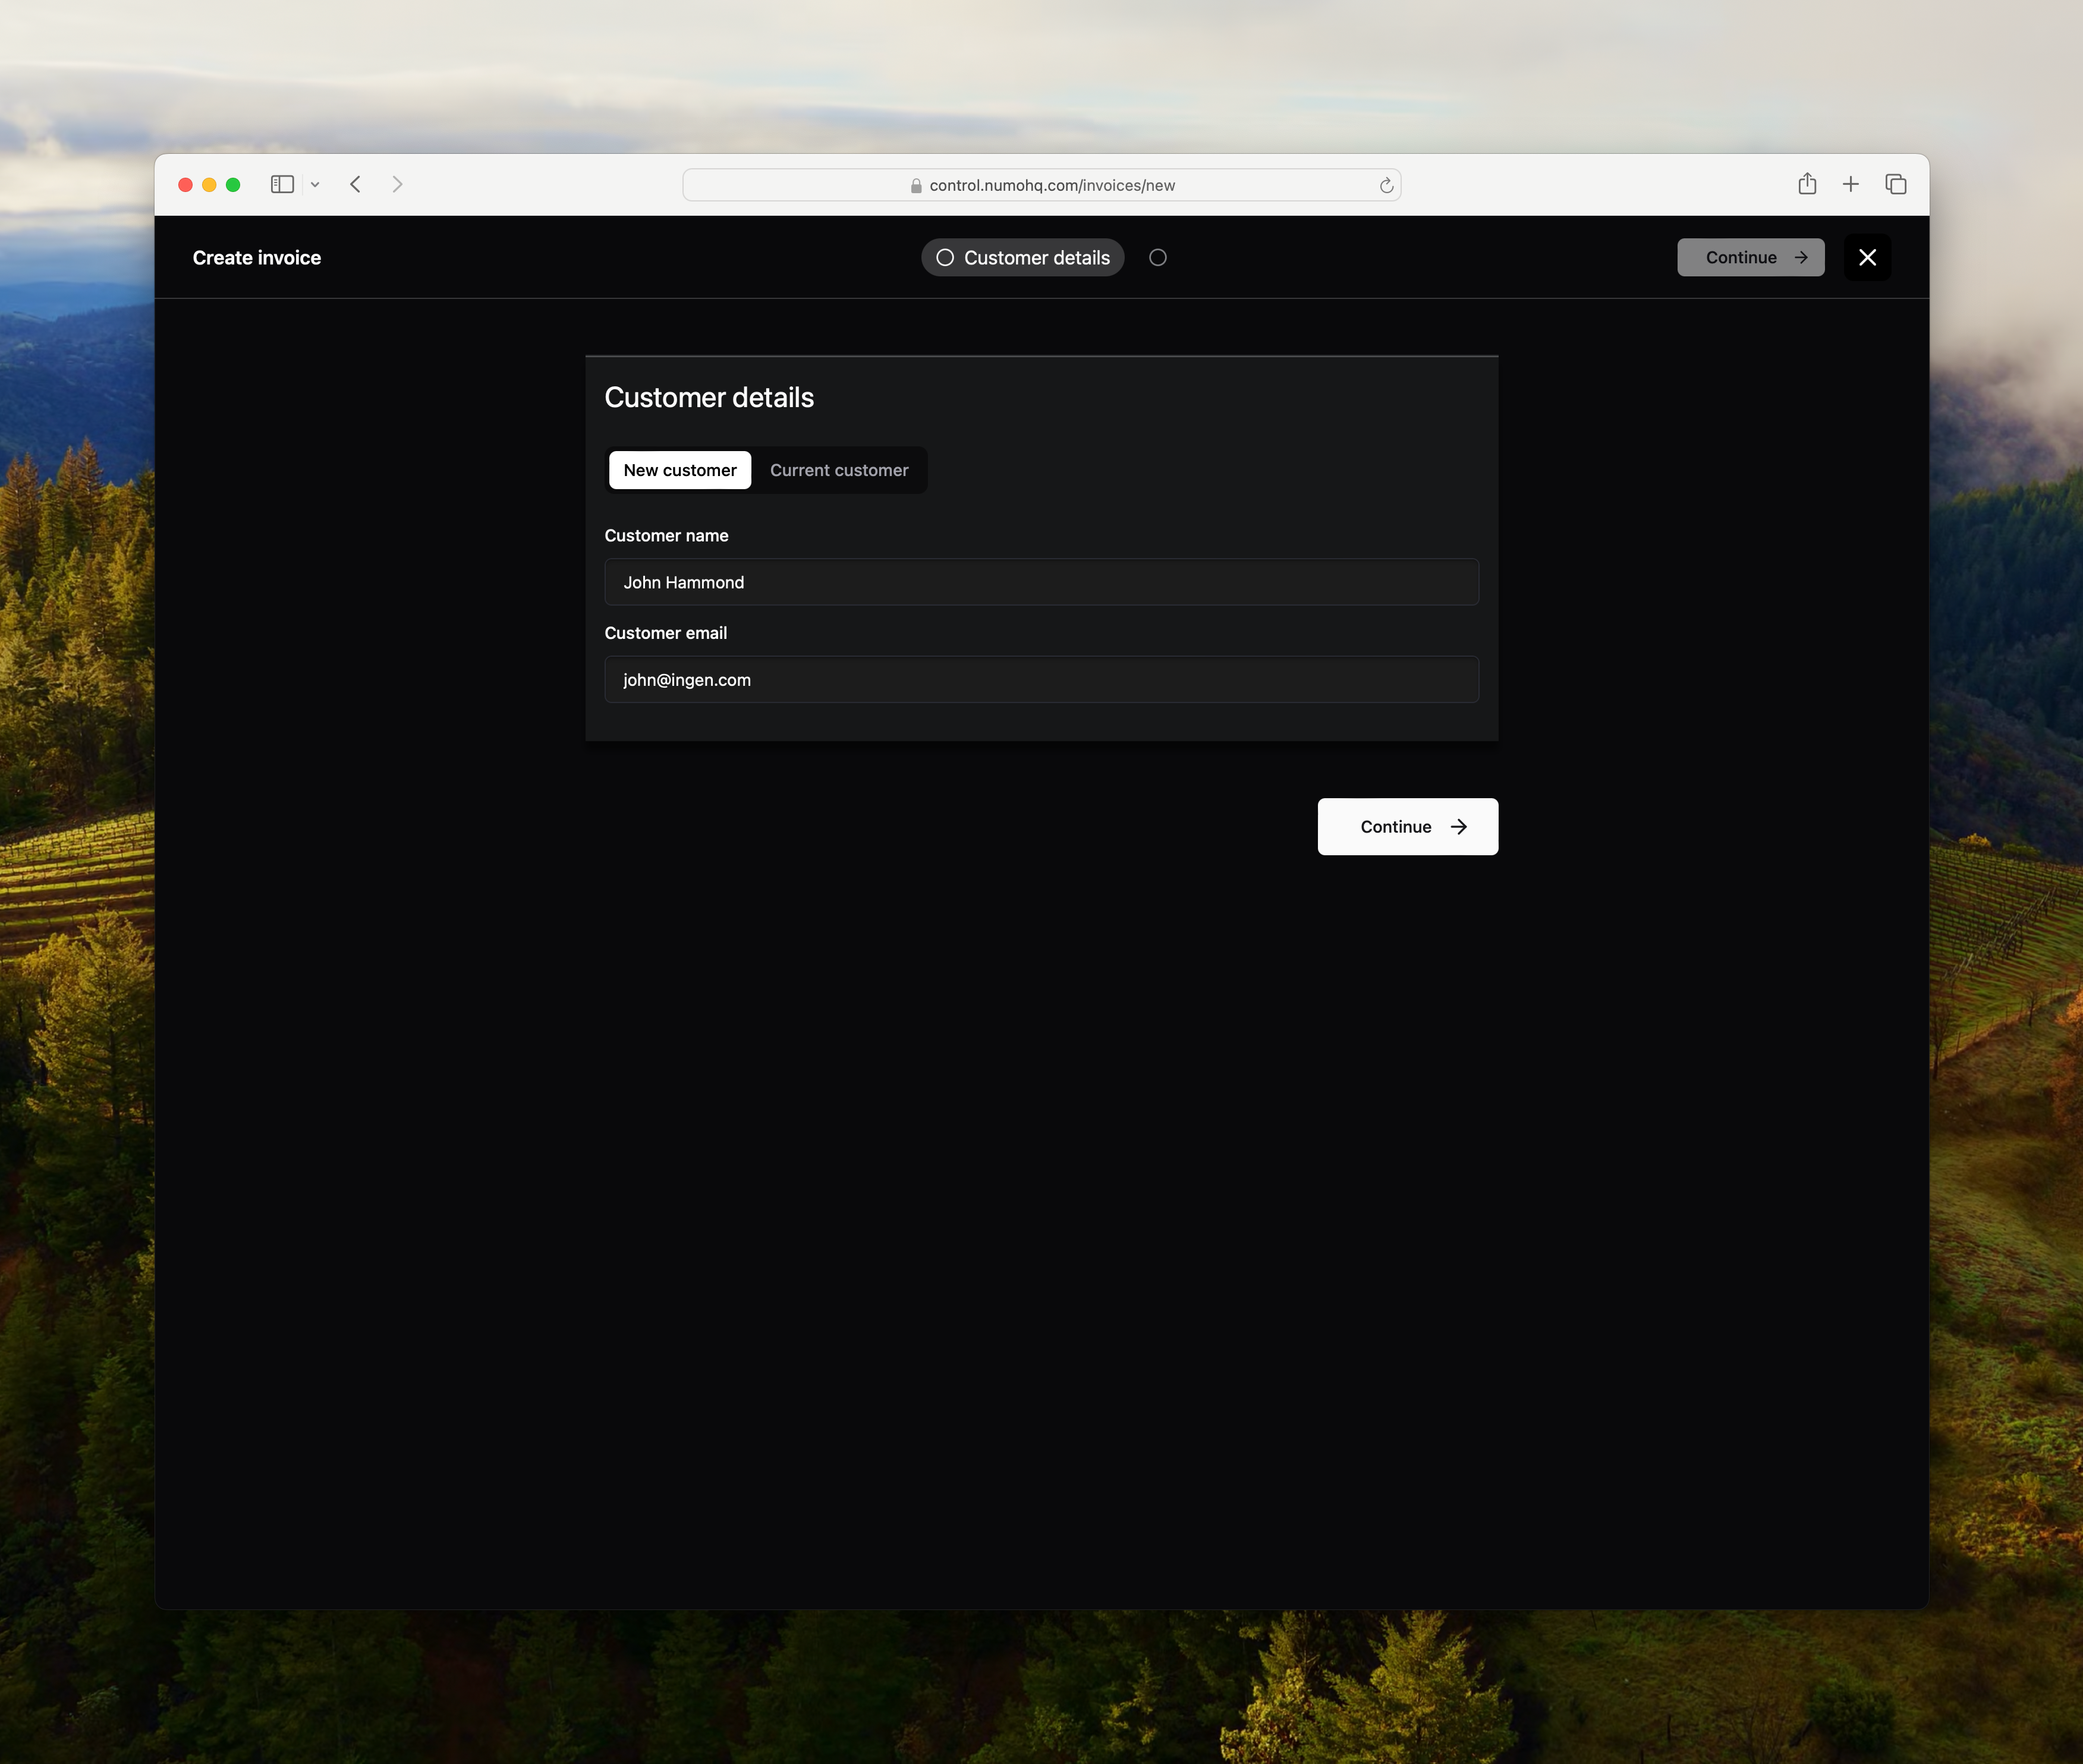
The description of the goods, services, or work you have done for them. This could be something as simple as "March 2024 App Development Services"
Then enter the total you would like to charge your customers in US Dollars.
Lastly, you can optionally add a custom note to the invoice. This could be blank, a quick "thank you for your business," or a specific project reference number the finance team at your customer would use to look up your project.
You can also elect to have Numo automatically email the invoice to your customer. Those emails look like this:
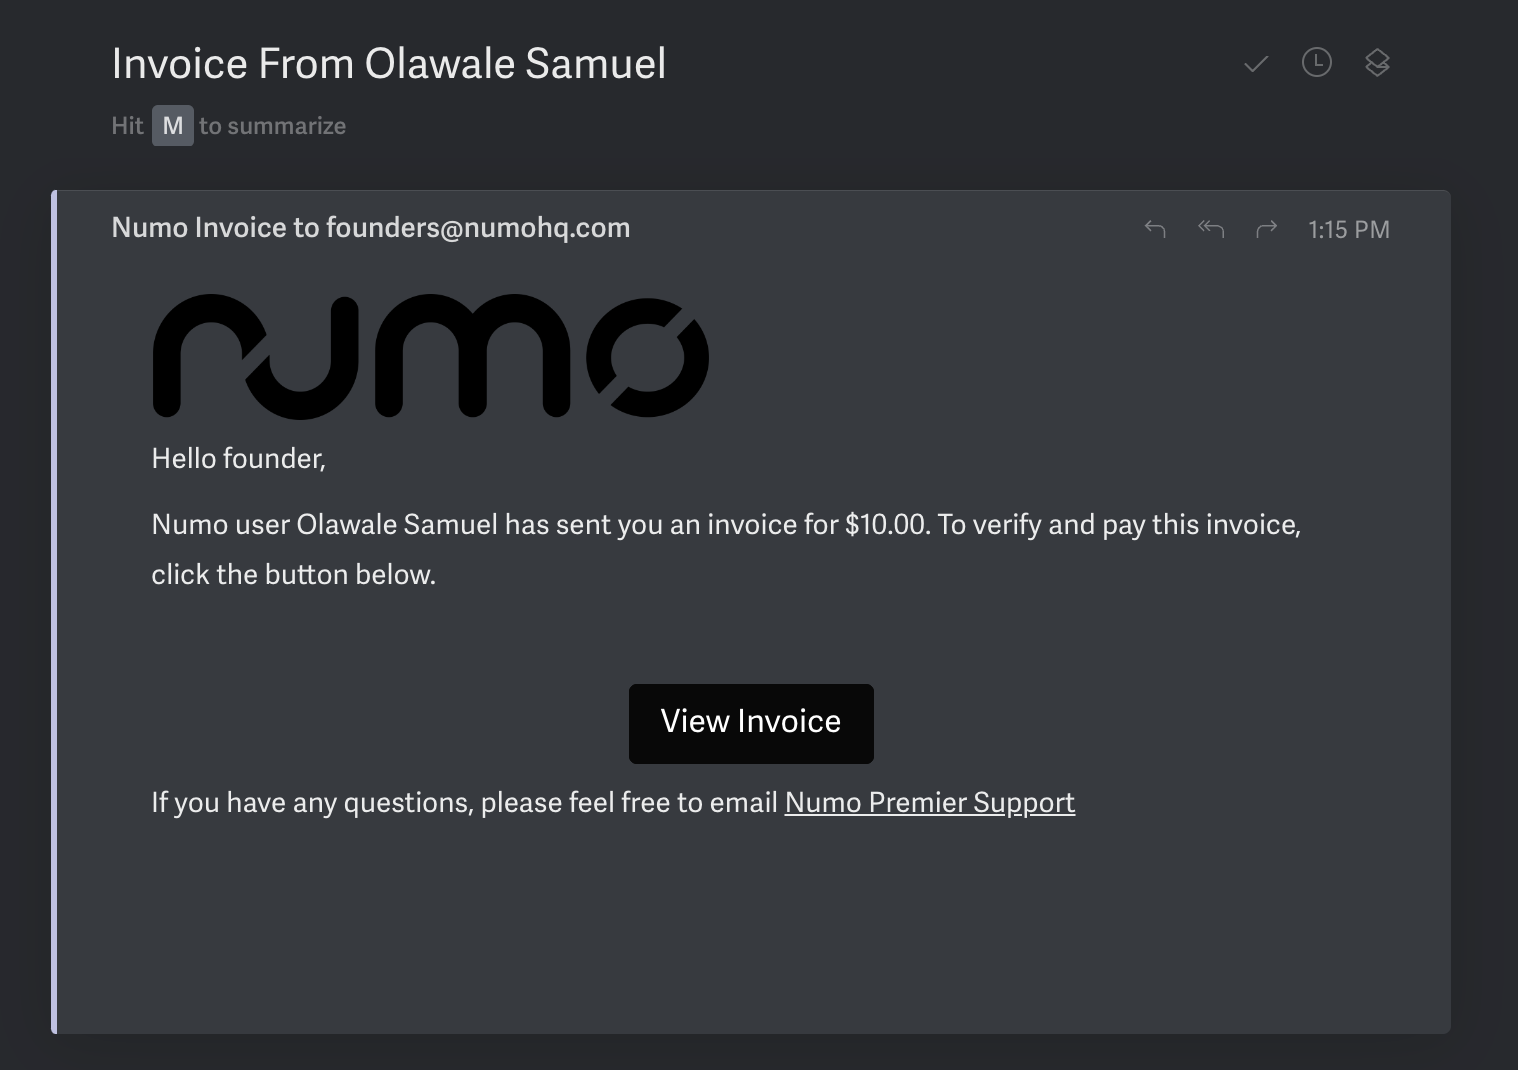
With the subject line: "Invoice from Your Name"
And a link to view the invoice. When they click that link, they are brought to your invoice page:
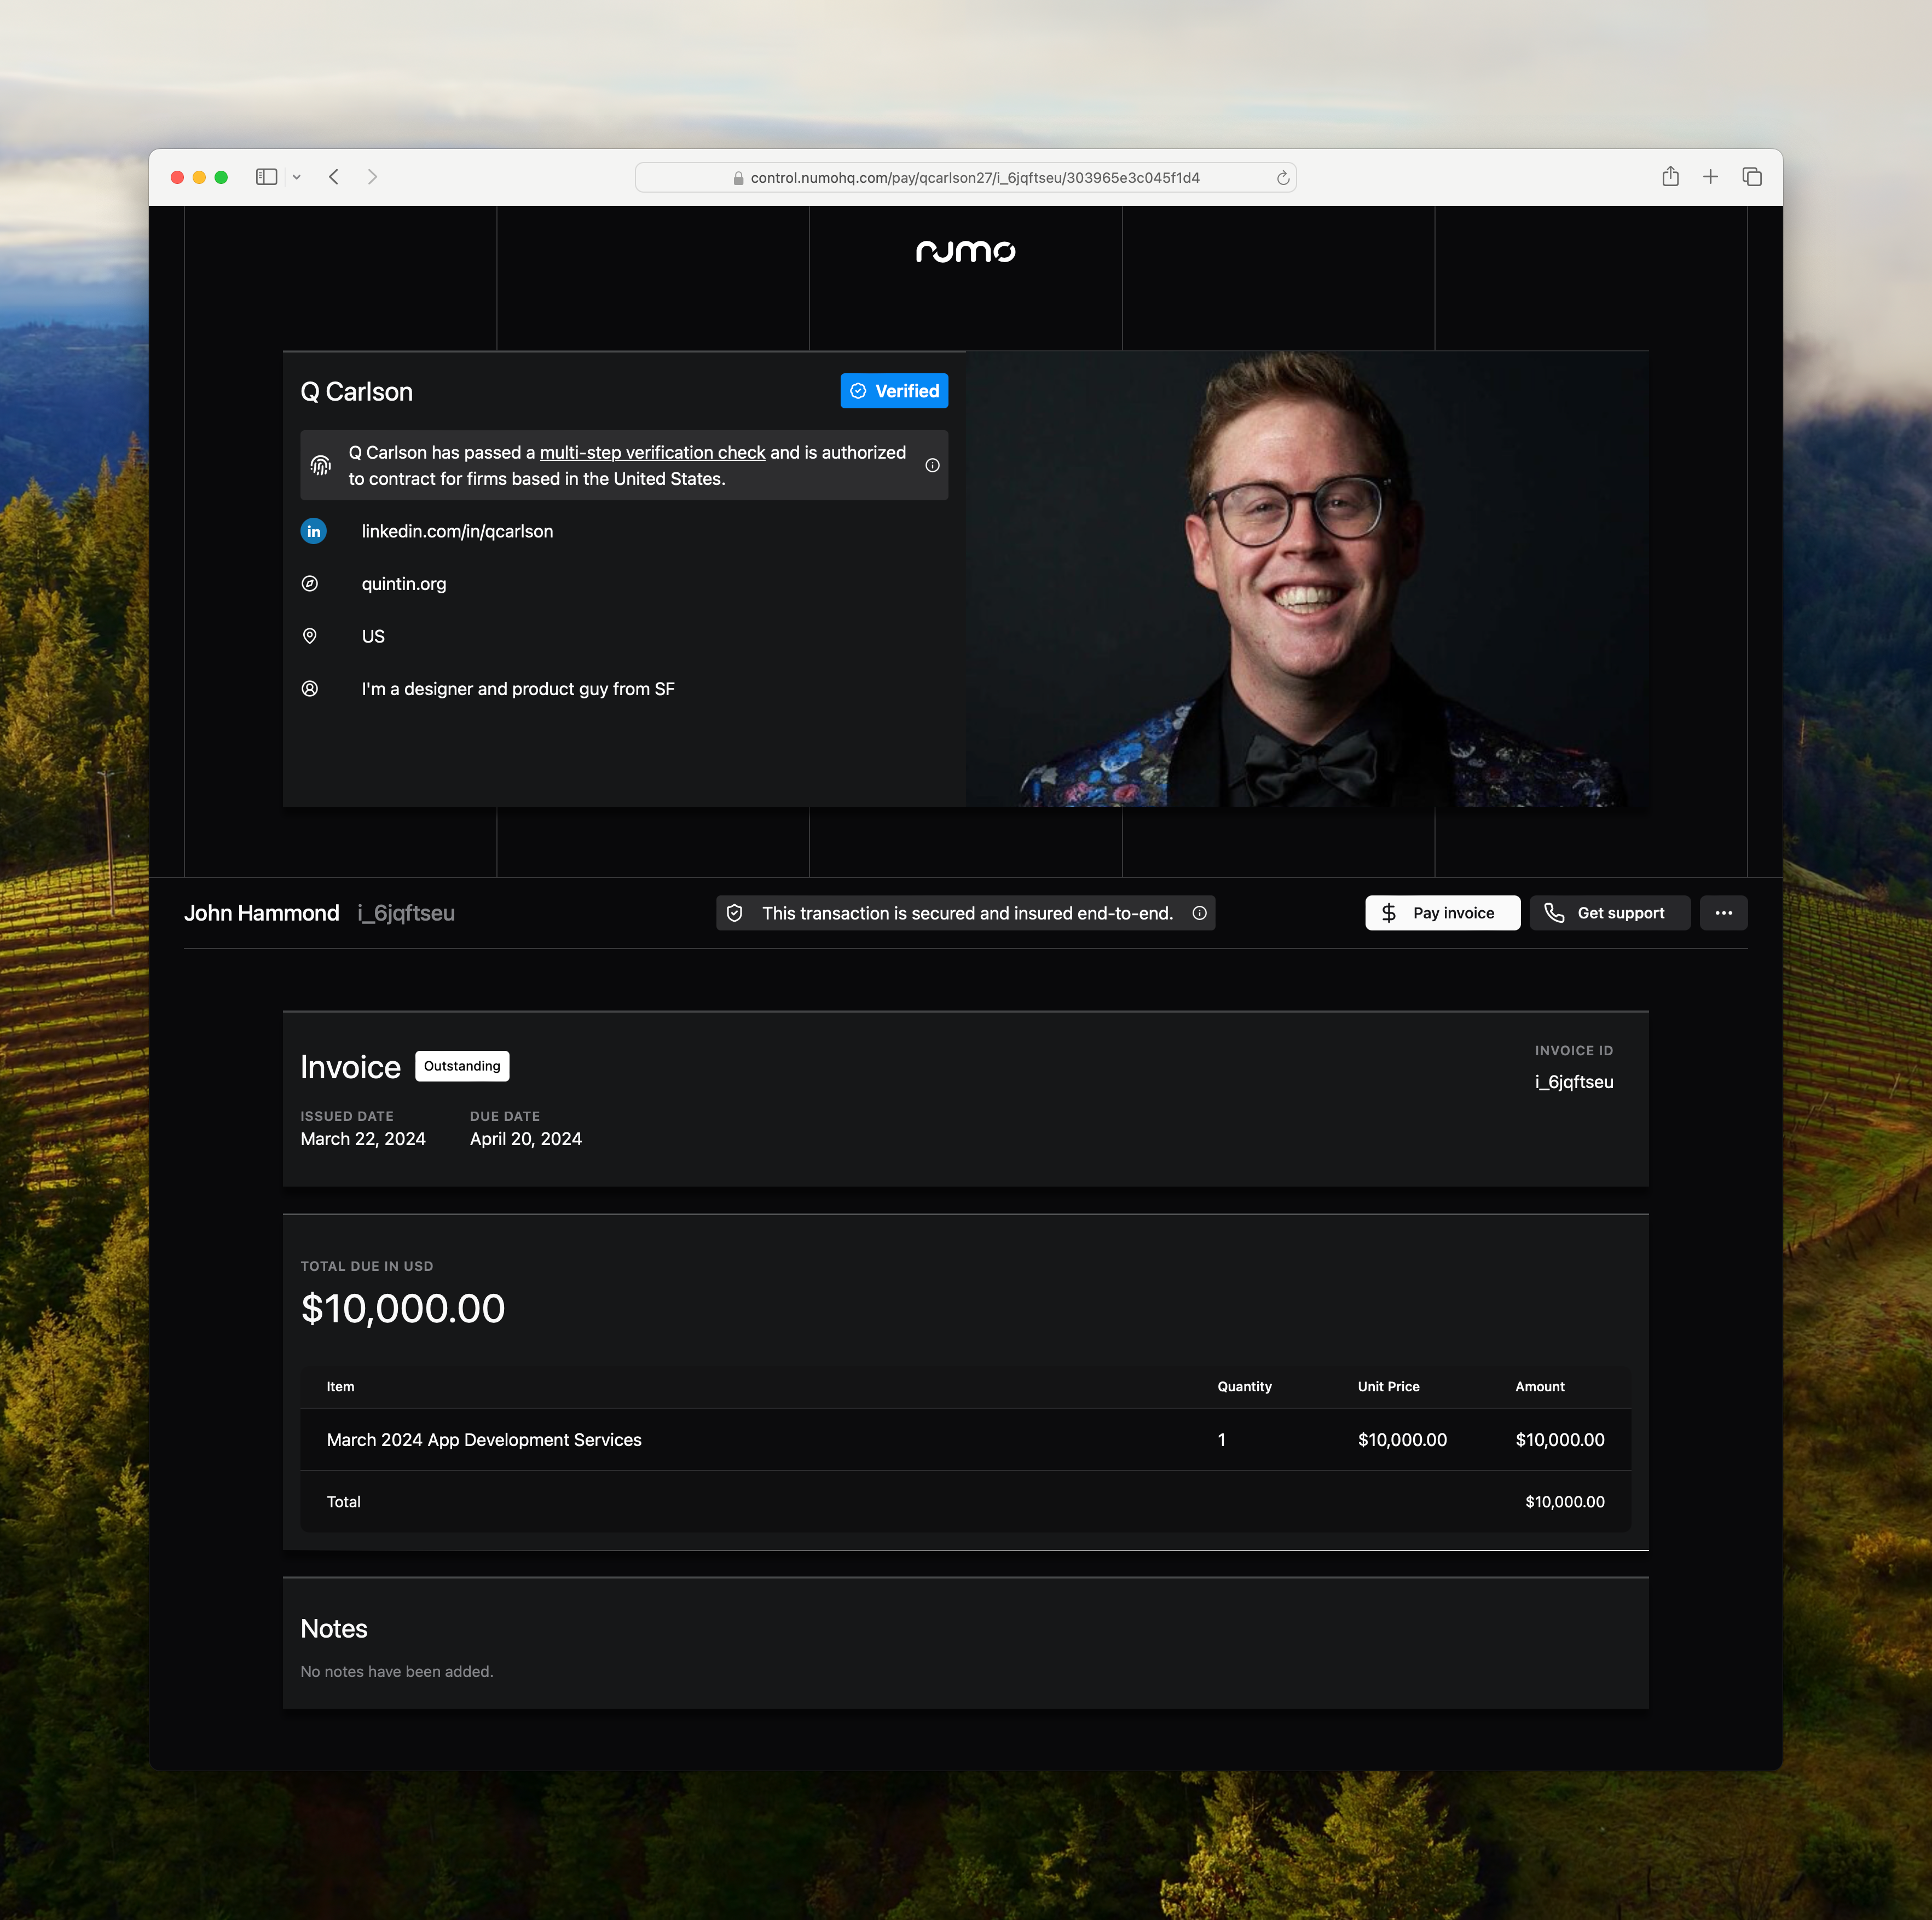
Your profile appears on top of every invoice.
A few small notes:
Right now, invoices are defaulted to NET-30 terms — meaning they are marked as due 30 days after they are created. In the future, you'll be able to update these details.
Your profile will be update-able from the Settings page in the Numo Control app starting later in March. For assistance changing any details before then, please email premier@numohq.com.